
GROUPSHOT.
You've probably noticed Groupshot on the sites and the new Image tab on your stock and custom products.
Here is how you use that interface so you can have large images for your custom products in your stores.
Image Tab and New Interface

After you save the info on the product page, when adding a new product, you are moved to the Image tab. This is what the interface looks like. It is pretty simple to use.
- The old secondary image uploader if you want to use that. Click save after you upload the image.
- If you want to upload a zip of images all at once, click here, find the file, and then click save.
- If you want to upload an individual image, you can here.
- The save icon. You know it.
- This is the trash can. It will delete your whole product if you click it. Tread carefully.
What to name the file
There is a simple naming convention for the files you upload. Say you have a JPG of a sweater that is Cardinal Red Heather. You would name the file CardinalRedHeather.jpg. The capital letters will let the system know to put spaces between each word. It is that simple.
Zips
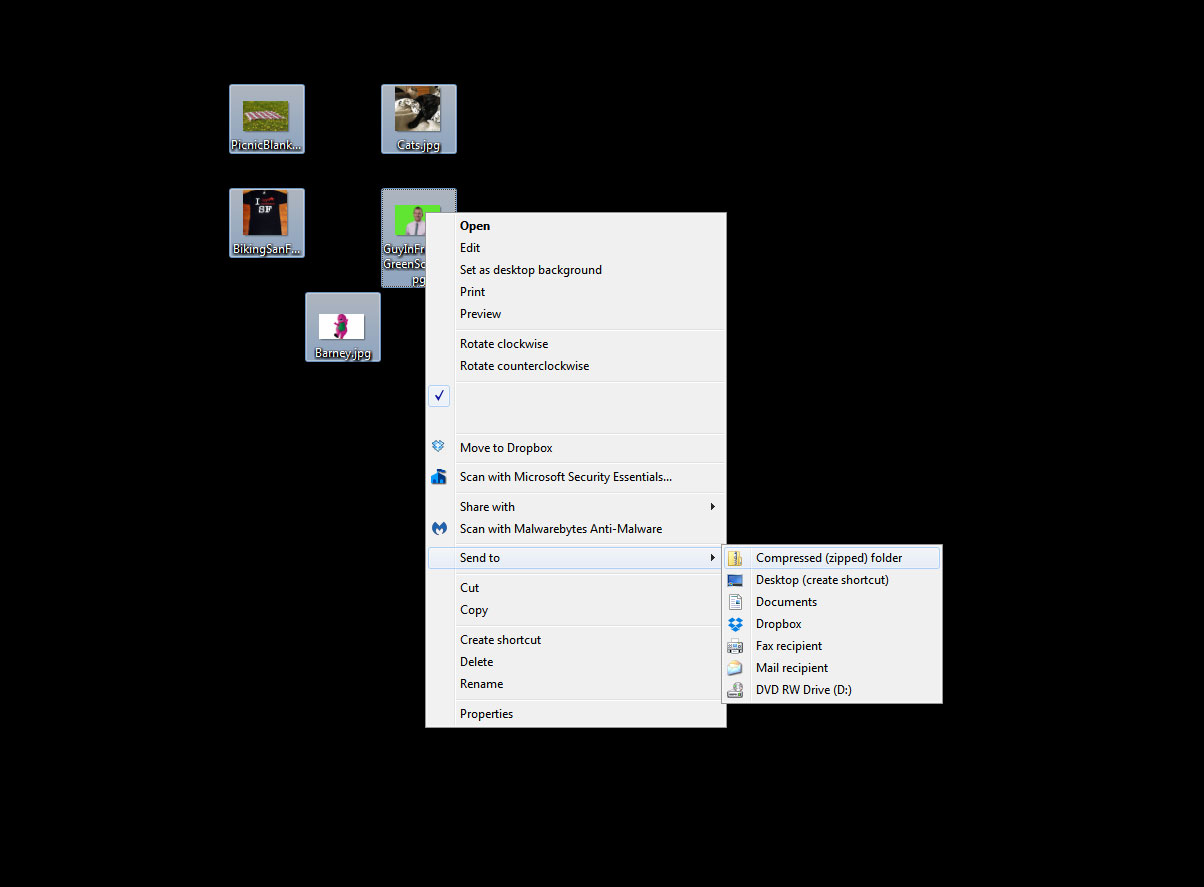
If you have a bunch of images you want to upload at once into Groupshot, just do the following.
- Put the images in the same place on your PC/Mac.
- Use your mouse to select all the images at once.
- Right click to bring up the flyout menus.
- Go down to Send To and select 'Compressed (Zipped) Folder
The interface for a Mac is essentially the same. I am using PC in the example.
After Uploading

After you upload, the Groupshot interface looks like this. You can add more images later if you want, edit the names (#1) or remove an image (#2). Just remember to save after you make a change.
Groupshot doesn't work on the following templates:
- A: Gradient
- B: Right Side
- C: Tabbed
- D: Modern
- E: Corporate
- F: Corporate 2
- G: Eco Template
- H: Leafy Edge
- I: Color Box
- J: Winter
- K: Holiday
- M: Valentines
- N: Spring
- O: Sunny Skies
It is supported in all other templates.
Comments
0 comments
Article is closed for comments.