
This is the one of the highlight features of the CM interface. You have a product that isn't in our database, but you want to put it in your store. Why, of course you can do this. Here is how:
How to create a custom product:
- Click on Products in the menu to the right.
- At the top of the product page click the bold link that reads “Add Product”.
- You will see a blank product form on the Products tab.
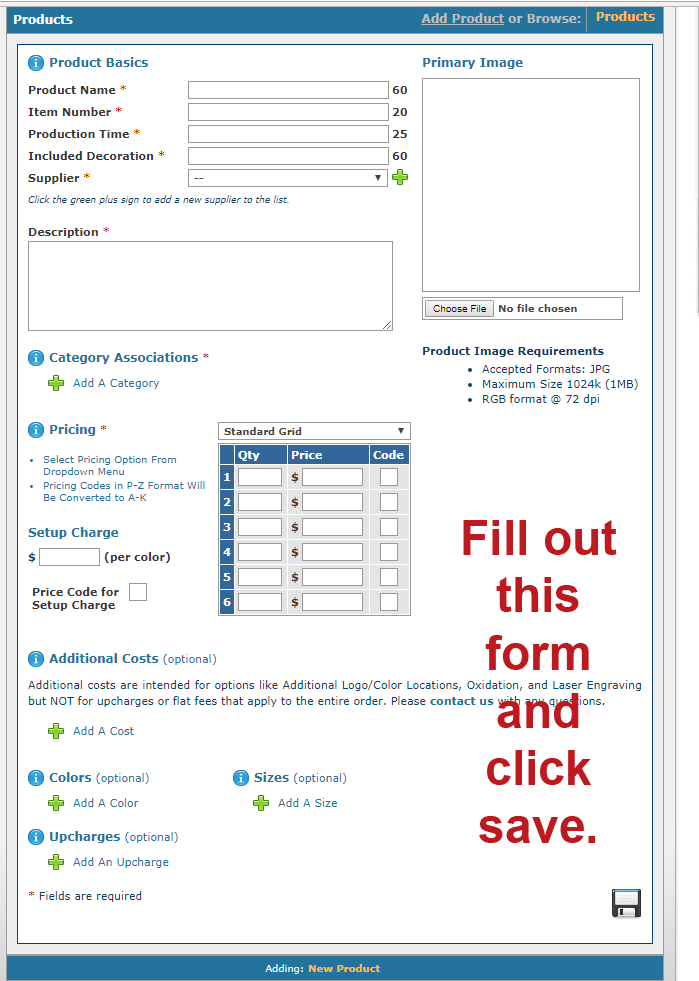
- Fill out the form. All fields marked with a red *, including uploading a picture, need to be filled out before you can save. Under category, make sure you select only the category or categories you want the product to appear in. If you created a custom category, you will be able to select it here.
- Don’t forget to Save!
- When you hit save, the other tabs, Images, Logo, Supplier, and Store Status will appear.
- The image tab is where you upload a secondary image or Groupshot
- The Logo tab is where you set the logo.
A. If you would like to add a logo to your custom product, click on the “Logo” tab. By default no logo
will be placed on the item. Using the interface, select the color, scale, angle for the imprint area.
B. Using your mouse, click and drag the imprint area shown to place it on the image.
C. To preview your changes, click “Preview” otherwise click “Save” to complete the changes. - The Supplier tab just have the info for the supplier you selected.
- The Store Status page is where you can turn a product on/off in a store.
It is that easy.
Comments
0 comments
Article is closed for comments.